Minestrone Soup

My family and I meal prep, we sit down every weekend and decide every dinner for the coming week.  It may seem daunting, but it’s easy and saves us the hassle of not knowing what to cook, and making those mid-week grocery runs, buying everything we don’t need.

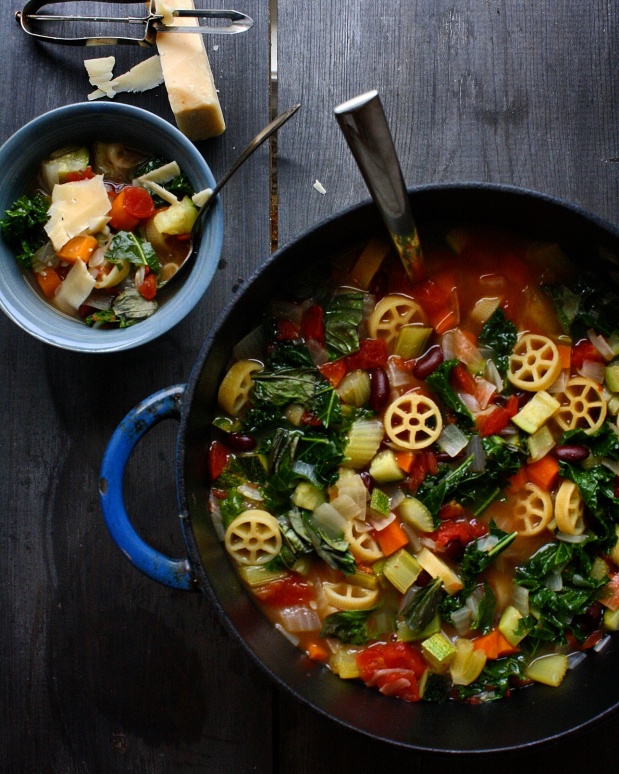
We’re pretty good at making meals at home 95% of the time; we may eat out once or twice a month, but we damn sure don’t cook every night.  The key to our sanity is cooking meals that will feed the family for two nights.  Tonight I made minestrone soup, which will easily feed our family of four two nights (disclosure: my kids are 1 and 3…).

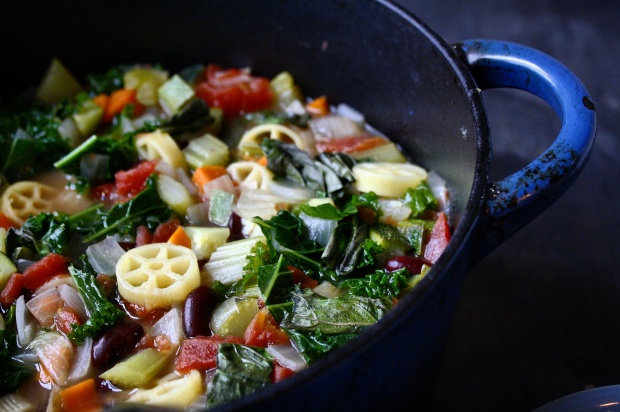
This minestrone recipe is one we reach for about once a month.   It’s light, fresh, easy to make, and packed with flavor.  It’s a one pot meal, making clean-up minimal.

Ingredients:

  • 1 large yellow onion, large dice
  • 4 medium carrots, large dice
  • 3 stalks celery, large dice
  • 2 medium zucchini, large dice
  • 8oz pasta (my kids picked out pinwheels)
  • 32oz chicken stock (unsalted or reduced sodium)
  • 14oz can of diced tomato
  • 15oz can kidney beans
  • Small bunch of basil
  • 3 handfuls kale, chopped
  • Salt and pepper to taste

Instructions:

In a 4 qt or larger pot, add small amount of vegetable oil and set over medium high heat. Add onion, carrot, and celery and cook until softened, about 5 minutes. Add zucchini and cook additional 3 minutes.  Add chicken stock, tomato, and beans.  Simmer for 10 minutes. At this point add salt and pepper to your tasting. Depending on how much salt has been added to the stock already, varying amounts of salt will be needed. Just remember, you can always add salt, it’s hard to take out salt once you’ve added too much.  Add your kale and pasta, and with lid on, simmer for additional 10 minutes or until pasta is al dente.  Serve with shaved parm and basil.

Minestrone_Soup

Minestrone is a very easy dish to make and is easily adaptable for what you have or like to eat.  You can change the pasta, change the greens, add different types of vegetables, use vegetable stock to make it a vegetarian dish, whatever you want.  Don’t be too concerned with keeping it “traditional”, its more important to enjoy what you’re eating.

Minestrone_Soup_2

Don’t forget my YouTube channel, check out my new Twitter @thejoshkestner, and feel free to comment below.
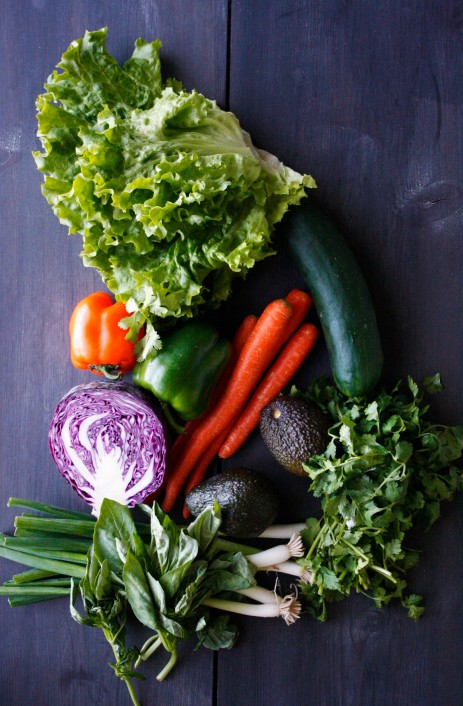


Big Mac Style Burger


I’m trying to eat ‘healthier’, so I had a Big Mac…  Sounds pretty damn stupid, I know, but I watched “Cooked” by Michael Pollan on Netflix the other day that said eat anything you want, just cook it yourself. 

I thought it was a pretty brilliant, simple thought “eat anything you want, just cook it yourself” – I can do that, I want to do that, but I also want a Big Mac… So I setoff, to make a Big Mac myself.  

Aristotle must have been talking about Big Macs when he said “The whole is better than the sum of its parts” There’s nothing really special about the ingredients, you’ll probably have almost everything you’d need laying around the house.  It’s just a burger, with normal burger stuff on it, aside from the Mac sauce, but that’s simple too.   Let’s break it down.

Two all-beef patties – I used ground chuck 80/20 blend, portioned into 2oz patties.  Make sure they’re super thin, form them in between two pieces of plastic wrap.  I grilled mine, but because the patties are so small and thin, it’s probably easier to use a skillet.  salt and pepper them.

_MG_1331

Special Sauce – Simple ingredients: 1/2 c mayo, 1tsp paprika, 1/2 tsp garlic powder, 1 tsp white vinegar, 2 tsp of finely diced onion, 1 tbs pickle relish.  Mix all the ingredients together, make ahead and store in fridge until ready.

Lettuce – Iceberg, shredded

Cheese – one slice of the processed yellow stuff we call American cheese, I even slap it on the burger without melting it just like they do.

Pickles – hamburger dill pickles

Onions – I live in the south, just 30 minutes south of Georgia so Vidalia is my choice, but we’re still a few weeks away from Vidalia season.  Any sweet yellow will do, just make sure they’re finely diced.  

Sesame seed bun – Find the plumpest bun you can find, because we’re not going to sacrifice any bottom buns to make the classic “club” middle bun.  Because I bought the largest buns I could find, I just cut the gigantic top half down the center.  Plenty of bun to go around, and no sacrifcial bun.. toast it.

_MG_1320

_MG_1318

Once you have your mise en place, its assemble time.  We’ll start from the bottom. Bottom bun > sauce > lettuce > pickle > onion > patty > cheese > club bun > sauce > lettuce > pickle > onion > patty > (i added more sauce here) > top bun.

Screenshot_2016-03-25-19-21-36-1

There ya have it, a classic Big Mac inspired burger only… better.  It didn’t take much time, no longer than it would have taken to cook any other dinner.  I guess I could have stuck with the “cook it yourself” a little better.  Next time I’ll make the bun from scratch or something.

I really get what Michael is trying to say though; eating terrible food is too easy for us these days.  You can easily eat a Big Mac twice a day, it’s so easy to do so, and many people do.  Having to make things yourself limits yourself to only wanting to do it every once and a while, I’m damn sure not going to make this every day, twice a day, just every once and a while, and having one every once and while isn’t too bad for you.  

I do recommend watching Cooked on Netflix.  I actually just bought his book in which the documentary comes from Cooked: A Natual History of Transformation. If its anything like the documentary, which it’s pretty obvious it will be, it’ll be a good read.

In closing, if you want to be healthier, eat a big mac.  Just make it yourself.

Don’t forget to check out my new Youtube page.  It doesn’t have any videos of me, but it does have great cooking tips, and recipes to try!  

And I’ve added a new share button below which will share it directly to the Yummly app.  If you haven’t checked out Yummly.com you should.   It has over 1mil recipes that you can search by ingredient, diet, allergy, nutrition, price, cuisine, time, taste, meal courses and sources. You should check it out; start by checking out some recipes I’ve added HERE

End.

Lodge Cast Irons

I love my cast irons, I really do.  I own two, both are inexpensive and are super versatile. You could seriously throw away every other skillet you own and just cook with cast iron. They’re super reliable, easy to maintain, virtually indestructible, and really cook things well. The two I use are the Lodge 10.25″ and the Lodge 12″ .  The 10″ I use as an every day skillet, from whipping up some potatoes for breakfast to a delicious dutch baby for dessert.  The 12″ I use more for roasting whole chickens, or large amounts of vegetables in the oven.

The key to enjoying your skillet is to make sure you’re taking care of it.  I’ve linked ol’ Martha below to show you how to properly season a skillet; either when you first purchase it, or after you’ve neglected it for some time.

Caring for a cast iron skillet may seem like a commitment, but it’ll provide you with a lifetime of  use.

Leave a comment below, tell me about your cast iron stories and recipes.  Tell us what tricks you have to maintaining them. Oh, and hey, I just created a YouTube channel, check it out, i’m starting to compile some other cooking tips and recipes.

Yogurt Pancakes

We eat pancakes.  We eat a lot of pancakes.  I’d like to share our pancake recipe.

This is a very simple recipe and easy to modify.  The recipe serves our family of four; around 8 pancakes in total.  Top with yogurt, maple syrup, fruit of your choice, or enjoy plain.

  • 1 c flour (I use 3/4 c unbleached white, 1/4 c whole wheat)
  • 1 tsp baking powder
  • 1/2 tsp baking soda
  • 2 tbs sugar
  • 3/4 c milk 
  • 1 egg
  • 2 tbs butter (melted)
  • 2 tbs vinegar, white or cider
  • 1/4 c plain Greek yogurt

Step 1. Preheat a griddle to 350, or nonstick pan on medium heat.

Step 2. Mix the dry ingredients in a bowl. Mix the wet ingredients in a separate bowl. Pour wet ingredients into dry, mix until combined. Don’t over mix.

Step 3. Ladle about 1/4 cup of batter on the griddle/pan. Flip once edges begin to dry, and bubbles on top begin to pop; bottom should be golden brown. Cook on second side for another 2-3 minutes, until golden brown.

Step 4. Repeat step three until batter is all used up.

Yogurt Wheat Pancakes Top


.END.

Vegetable Summer Roll

I’ve just returned from a three day cruise to the Bahamas yesterday and had the awesome idea of taking one extra day off work.  It was great hanging out with the family. Now that I’m back, i have some time to cook again. I’m slightly more tan, my wallets a lot thinner, and after gorging myself with lackluster food from the boat, I’m even fatter. I needed something fresh and light.  On my nearly seven hour drive back from Miami, where we sailed out of, I dreampt of making some Vietnamese inspired summer rolls.  Because I took today off, i decided to make a few for the family.  I’ve included two very simple dipping sauces at the bottom too.

This recipe is very simple, requires zero cooking, and tastes delicious.  It’s really just slicing your favorite vegetables and wrapping in Vietnamese rice wrappers.  You can find the rice paper in most grocery stores, or any local oriental grocery.  If you’re finding it hard to locate, or don’t have an oriental grocery near by, Amazon is a good choice too.

Vietnamese Rice Paper

For the filling, add whatever vegetables you like.  For this recipe, i used the following.

Filling

  • Summer Roll Vegetablescarrots
  • red cabbage
  • green leaf lettuce
  • bell pepper
  • avocado
  • scallion
  • basil
  • cilantro

Prepare all your vegetables in a julienne style cut so they fit nicely into the wrapper. Keep the leaves of the lettuce whole, just cut out the rib. Leave herbs whole as well.

Summer Roll Vegetables Cut

Summer Roll Vegetables Wrap
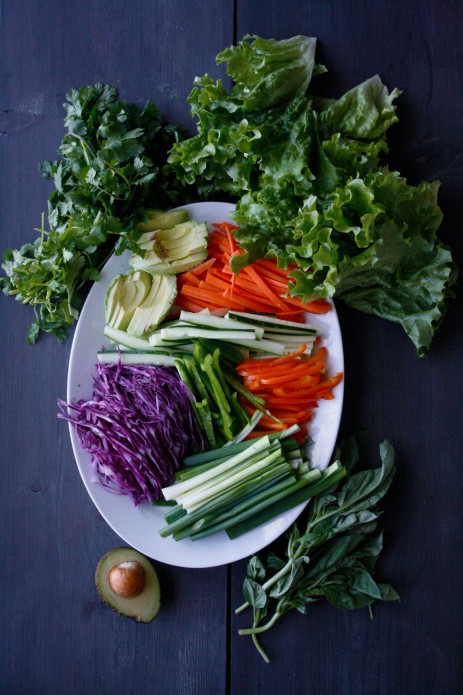
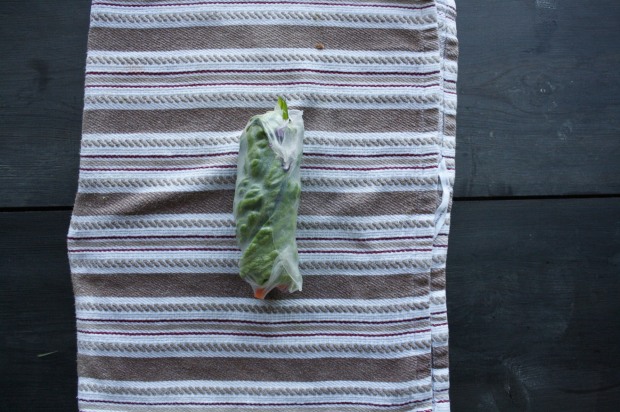
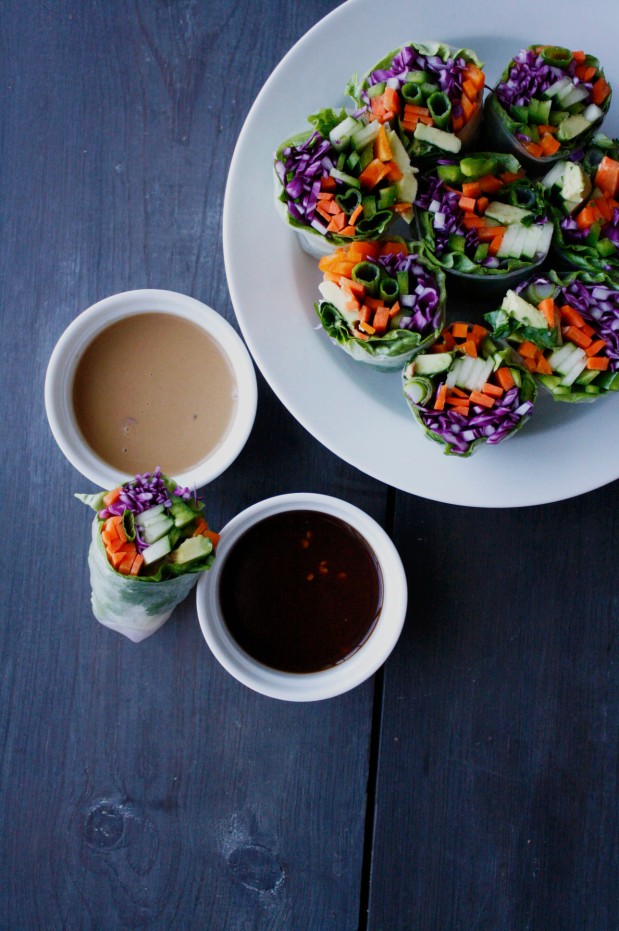
In a wide mouth bowl filled with hot water, roll the wrappers around until it begins to become pliable; about 15 seconds.  Lay the wrapper on a damp towel and add vegetables onto the first third of the wrapper. Setting it on the towel seems to work better than right on a cutting board; these wrappers are really sticky. Fold wrapper around vegetables once, tuck in sides and finish wrapping. Repeat until desired amount of rolls is achieved.  For us, two of these filled rolls worked per person.


That its.  They’ll store for a few hours in the refrigerator, but taste best eaten immediately.

Summer Roll Wrapped

But whats a roll without some sauces to dip in?  – I’ve added two very simple dipping sauces. Dip in either sauce, or in both for a great combo.

Peanut Sauce:

  • 1/4 c natural peanut butter
  • 1/4 c water
  • 1 lime, juiced
  • 1 tbs soy
  • 1 tsp fish sauce (optional)

Spicy Hoisen

  • 1/4 c hoisin sauce
  • 1 tbs sambal (hot chili paste)
  • 1 tbs rice vinegar
  • 3 tbs water
  • 1 tsp fish sauce

Summer Roll 3

Enjoy!


.END.


Dutch Baby

I love pancakes.  Pancakes are a tradition in our household, we eat them every Saturday.  This Saturday however, I threw a curve ball.  I made a dutch baby, which still counts as a pancake, i think.


Prep 5 min, cook time 15-20 min. Serves 4 or 2, or 1..

Ingredients:

  • 2/3 c flour
  • 2/3 c milk room temp – blast in microwave for 10 sec to rid of chill.
  • 3 eggs room temp – bathe in warm water to bring to room temp (the eggs not you)
  • 3 tbs butter
  • 1/2 tsp salt
  • powdered sugar – topping
  • 1/2 lemon – topping

Tools:

  • Cast Iron Skillet – My 10.25″ Lodge works perfect for this, or a similar sized heavy duty pan
  • Hand mixer – I use a simple Kitchen Aid mixer.
  • A fine mesh strainer for dusting powdered sugar on
  • Simple measuring tools

Dutch Baby Ingredients

Preheat oven 425, place 10 inch skillet. Beat the eggs in bowl until nice and airy (about 1-2 minutes with mixer).

Dutch Baby Eggs.jpg

Add flour, milk, salt and mix well til a very loose and smooth batter has formed.  It should look something like crepe batter.

Dutch Baby Batter

Carefully take skillet out of oven (needs to be really hot).  Add butter to pan, once melted, slowly add batter to pan.  Bake for 15-18 minutes, or until puffed and golden brown.

Dutch Baby Out of Oven

Drizzle with lemon juice, dust with generous amounts of powdered sugar and enjoy.

Dutch Baby

.END.

Roasted Hasselback Potato Recipe

I tested out Hasselback potatoes this afternoon, it’s a winner.

The name, it sounds so random but apparently it originated from the Hasselbacken hotel and restaurant in Stockholm.  It’s been around some time, but seems to be making a come back.

There’s plenty of recipes out there for these special little spuds, but I’ve had plenty of people asking for a recipe on it so I’ve provided one below.

Prep Time 15min, Cook Time 45min – Some quick math and we come up with 1hr total time.

Ingredients:

  • As many potatoes as you’d like – i used russets, any potato works.
  • 1 Head of garlic
  • Fresh thyme
  • Olive Oil
  • 1 Red onion
  • Salt & Pepper

Tools;

  • Sharp knife
  • Two wooden/plastic spoons
  • Cast iron skillet  – i’m partial to my lodge cast irons, they’re inexpensive and are the workhorse of my kitchen

Preparation:

Preheat oven to 425 f.  Wash the spuds and begin slicing into about 1/8th inch strips, not to cut all the way through.  I found that if you use two wooden spoons on either side of the potato as you’re cutting, it provides a way to stop you from cutting all the way through.

Cut with Spoons

Once you have all the potatoes cut, peel the red onion and slice it into wedges. Take whole head of garlic and cut the top off so the cloves are exposed. Place potatoes, garlic, and red onion in cast iron skillet or similar dish for roasting. Add sprigs of fresh thyme, brush potatoes liberally with olive oil, season everything with salt and pepper.

Prebake

Place into preheated oven.  After about 30 minutes, baste again with more olive oil.  Once potatoes have fanned out nicely (about 45 minutes in total) They’re ready.  Finish with a final brushing of olive oil, fresh cracked pepper, and more salt.  Serve as a side, or as we did a main dish.  Don’t forget to pluck those delicious little garlic cloves and smother those on the potatoes as well (you won’t regret it).

ME - Hasselback Potato

Let me know if you guys have tried the recipe, if you’ve had success, or if it was a complete failure.

Final2

.End.